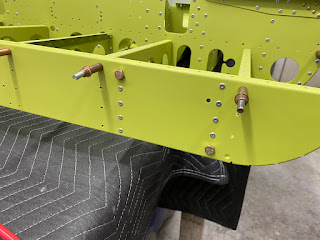
Deburring, edge prep, etc.
Saturday, September 16, 2023
Friday, September 15, 2023
Thursday, September 14, 2023
Fuselage center section #35 - bottom skin prep
Spent this evening prepping this pile of parts. Lots of edge treatment, deburring and slightly chamfering holes. Also dimpled where some nutplates will be installed.
Oh crap! I forgot the bottom skin! Back to the garage!
Wednesday, September 13, 2023
Fuselage center section #34 - bottom skin prep
Flipped the center assembly today and got started on the skin and other part prep....
Flipped the whole assembly. Shored up the middle and let the vertical parts hang between the tables.
Spent some time looking for a part that does not get used on the ULS version. I did not look at the KAI's that tell you to skip it.
Tuesday, September 12, 2023
Fuselage center section #33 - Foot floor area part assembly
Came home today after work and got the floor rib area parts primed. Then after they were dry I finished the riveting of this area.
MMMMM, primed ribs!I almost screwed up but took another glance at the KAI's and realized that this cap does not actually cap the verticals like it did on my RV7, it sits on the forward web of the verticals.
Monday, September 11, 2023
Fuselage center section #32 - Foot floor area part prep
Deburring, acid etch and scrubbing the foot floor rib parts that I have prepped..
Sunday, September 10, 2023
Fuselage center section #31 - Foot floor area part prep
Got to move another area forward to the foot rib area of the forward fuse:
So the RV7 had a ton of parts that had to be fabricated out of heavy stock like this. The 12 not so much and I am grateful. I have been dreading having to deal with these but here we are.After separating the 4 parts out of the angle, I cleaned up the ends nice and square using the disc sander with a brand new piece of sandpaper. This made this easy and did not heat up the parts too bad.
Next was marking the parts per the drawing. There are two different parts here and each have mirrors of each other for a total of four parts. Extreme caution is used to prevent removing or damaging fingers. Fresh blades cut this stuff like butter.
Measure three times and cut once. Pay careful attention to which version of the part you have and watch the mirrored features!
The two center ribs get dimpled for future flush rivets. Use the 120° dimple dies here because these will get pulled rivets and pulled are 120° and solid rivets are 100°.
Subscribe to:
Posts (Atom)


