Working on spar prep. - 2 man hours
Fitting the fwd and aft spars to the spar cap assembly.
Apparently Van's is laser cutting parts these days. This one got a bit scorched.
Riveted the outboard horn attach angel to the spar. I had already primed it in a prior session.
Cleco'd the upper control horn to the spar assembly.
You have to center up these holes before drilling. Make the smaller holes concentric with the larger ones in the horn.
Match drilled the horn to the spar assembly. They call out a #20 but I only had a #21 and it worked out just fine.
Use the black cleco's for the horns. I had plenty from prior projects.
Use plenty of cleco's to hold this sucker in place while drilling.
Black cleco's in every hole as they are drilled.
Used an angle drill instead of a long bit called out in the manual for these #30 holes.
Repeat for the bottom control horn.
Repeat the angle drilling to the horn attach angel.
Drilling the inboard horn attach angle.
Reaming the horn cable attach hole full size to #12.
Reaming the counterbalance arm brackets full size to #30.
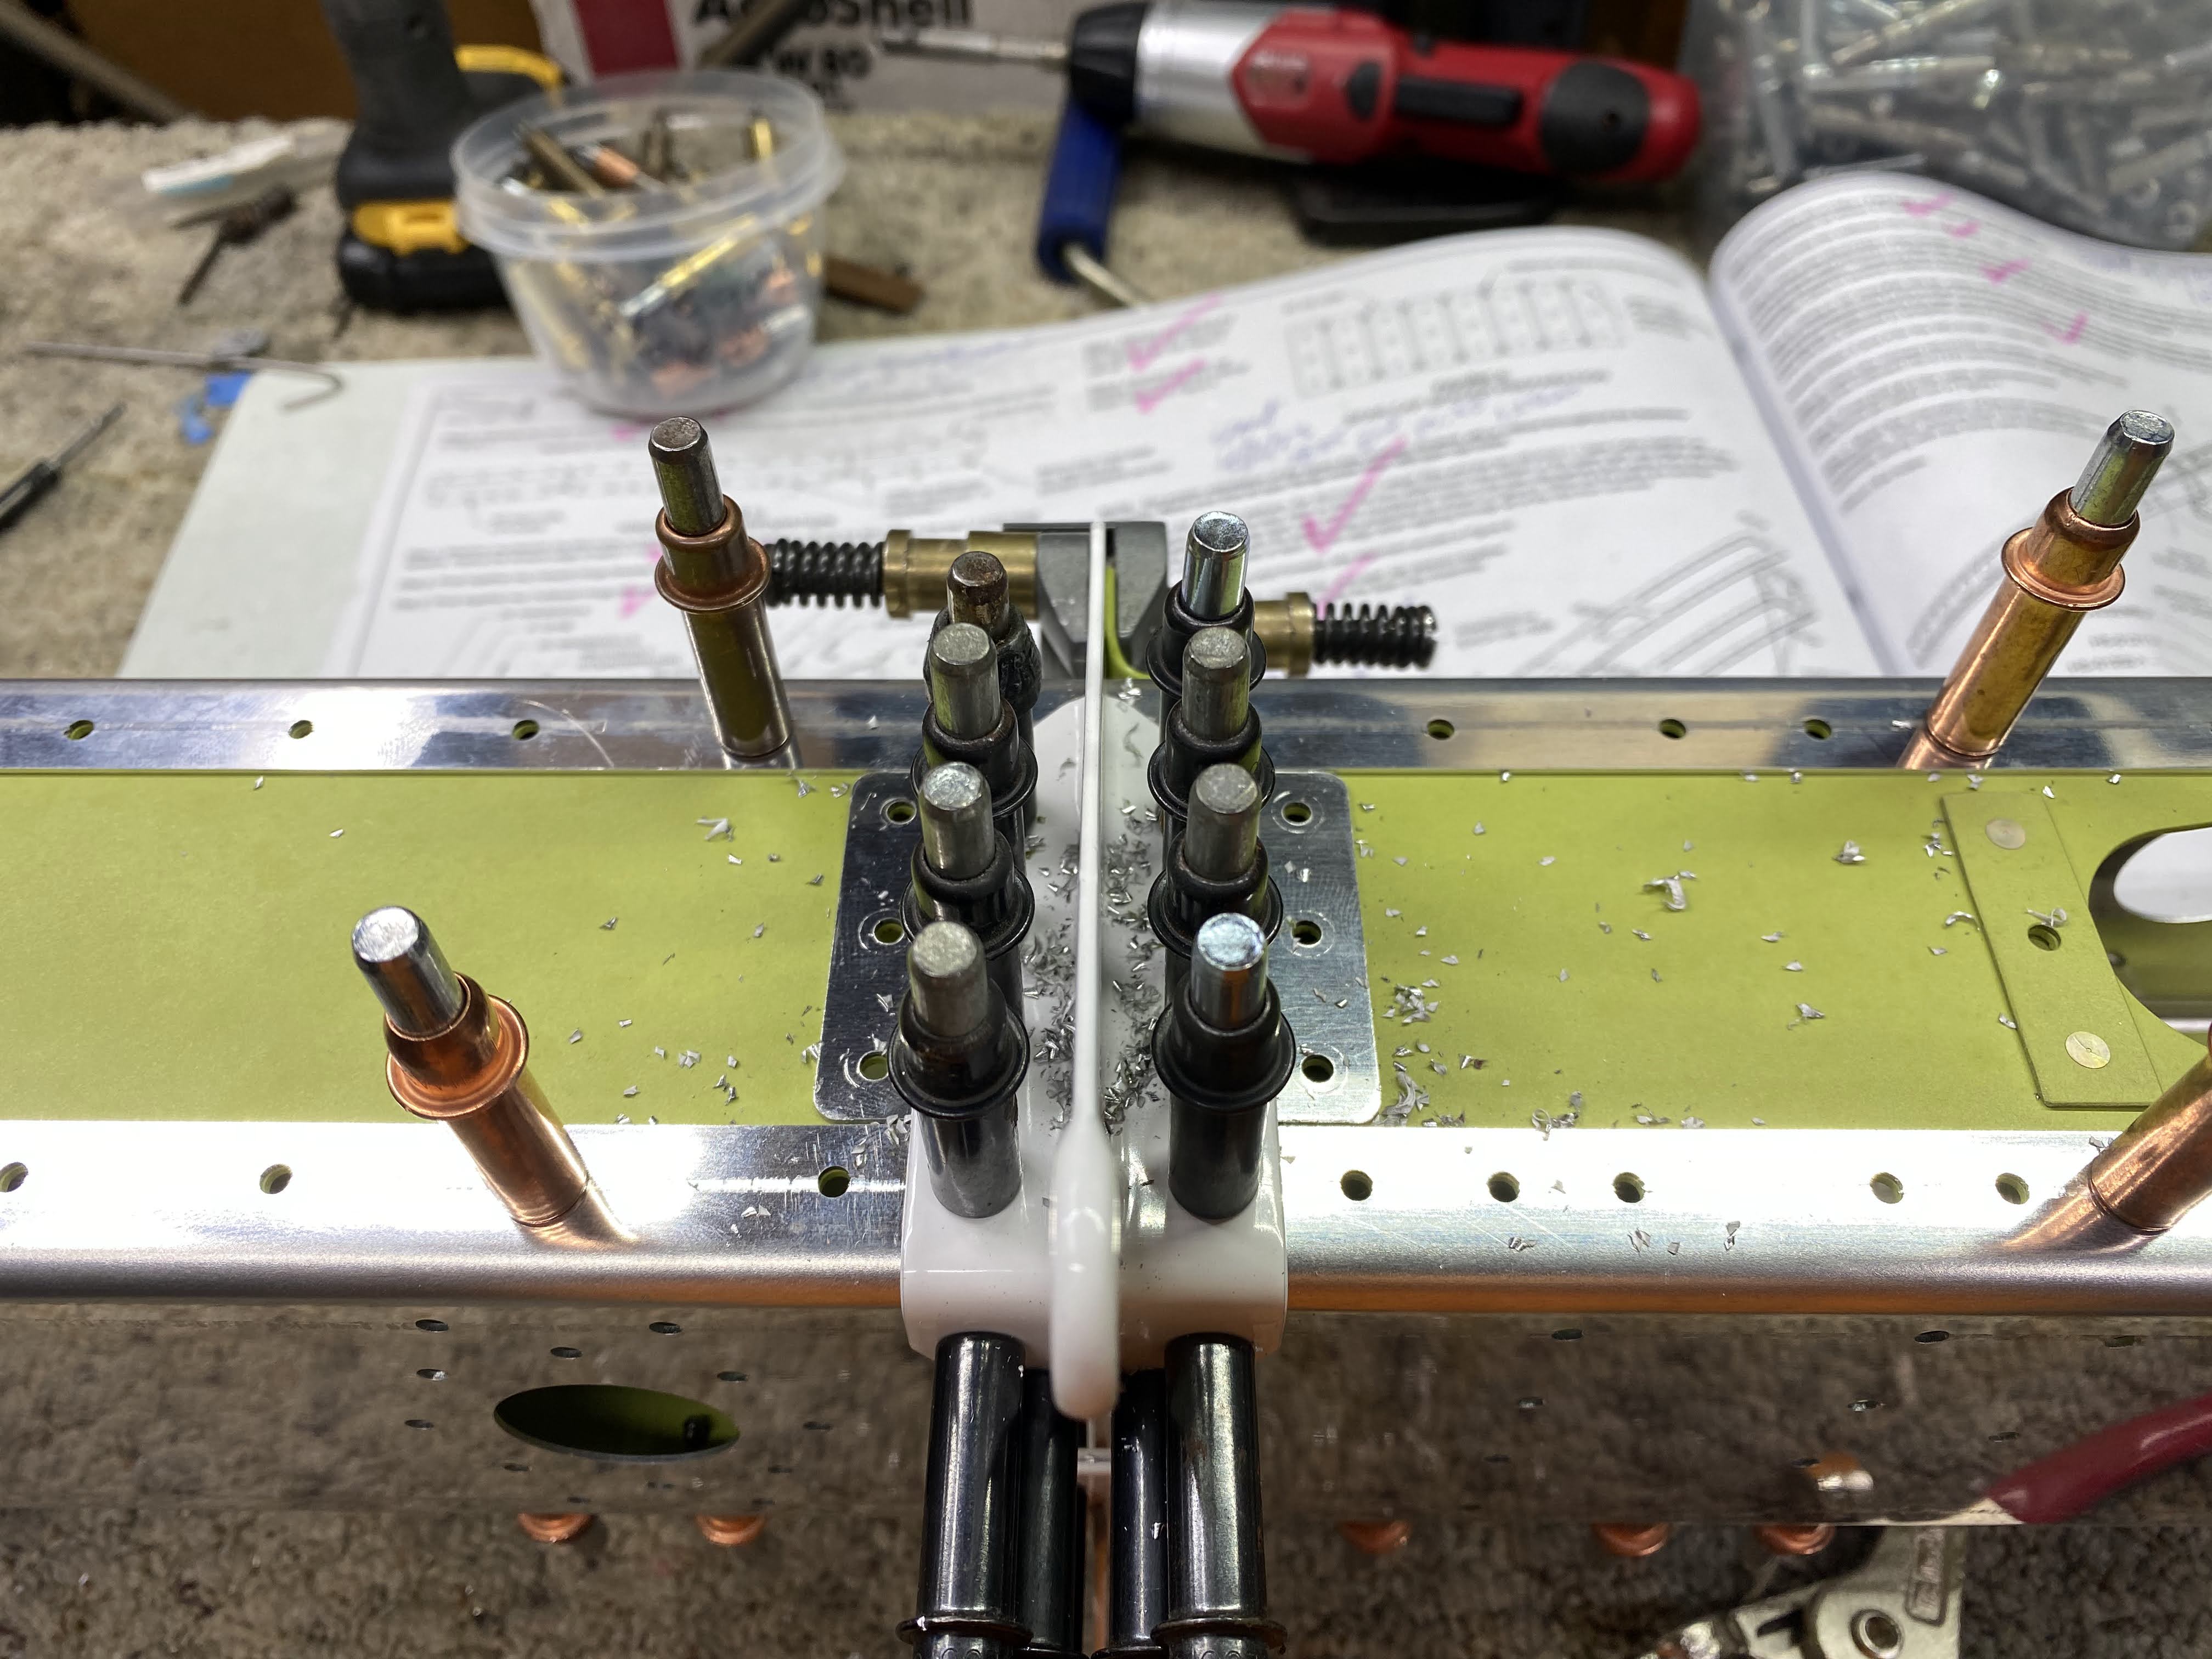
Cleco the brackets to the spars at a 90° angle to how they will be installed. This is so you can drill the counterbalance arm to the brackets.
Setup a jig to keep everything in the correct plain and orientation.
Drilled the pilot hole in both brackets on both sides. #30
Cleco the arm to the brackets after each hole is drilled.
Next drill the arm to the brackets full size.
Install a temporary bolt in the first side to be drilled.
Then drill the other side and check that a bolt fits.
Rotate the brackets 90° keeping the correct orientation of the holes.
Mark the brackets to ensure they get put back in the correct place and orientation otherwise those bolts will not fit on assembly. You don't want any slop in this setup as that could cause counterbalance failures down the road.


No comments:
Post a Comment